Follow along as we dissect an awesome method for accelerating your web application server deployment. Huge thanks to Chris Maki for his help in putting this guide together!
Today’s web applications — and especially enterprise variants — have numerous moving parts that need continual upkeep. These tasks can easily overwhelm developers who already have enough on their plates. You might have to grapple with:
- TLS certificate management and termination
- Web server setup and maintenance
- Application firewalls and proxies
- API gateway integration
- Caching
- Logging
Consequently, the task of building, deploying, and maintaining a web application has become that much more complicated. Developers must worry about performance, access delegation, and security.
Lengthy development times reflect this. It takes 4.5 months on average to build a complete web app — while creating a viable backend can take two to three months. There’s massive room for improvement. Web developers need simpler solutions that dramatically reduce deployment time.
First, we’ll briefly highlight a common deployment pipeline. Second, we’ll explore an easier way to get things up and running with minimal maintenance. Let’s jump in.
Cons of Server Technologies Like NGINX
There are many ways to deploy a web application backend. Upwards of 60% of the web server market is collectively dominated by NGINX and Apache. While these options are tried and true, they’re not 100% ready to use out of the box.
Let’s consider one feature that’s becoming indispensable across web applications: HTTPS. If you’re accustomed to NGINX web servers, you might know that these servers are HTTP-enabled right away. However, If SSL is required for you and your users, you’ll have to manually configure your servers to support it. Here’s what that process looks like from NGINX’s documentation:
server {
listen              443 ssl;
server_name         www.example.com;
ssl_certificate     www.example.com.crt;
ssl_certificate_key www.example.com.key;
ssl_protocols       TLSv1 TLSv1.1 TLSv1.2;
ssl_ciphers         HIGH:!aNULL:!MD5;
...
}
Additionally, NGINX shares that “the ssl parameter must be enabled on listening sockets in the server block, and the locations of the server certificate and private key files should be specified.”
You’re tasked with these core considerations and determining best practices through your configurations. Additionally, you must properly optimize your web server to handle these HTTPS connections — without introducing new bottlenecks based on user activity, resource consumption, and timeouts. Your configuration files slowly grow with each customization:
worker_processes auto;

http {
ssl_session_cache   shared:SSL:10m;
ssl_session_timeout 10m;

server {
listen              443 ssl;
server_name         www.example.com;
keepalive_timeout   70;

ssl_certificate     www.example.com.crt;
ssl_certificate_key www.example.com.key;
ssl_protocols       TLSv1 TLSv1.1 TLSv1.2;
ssl_ciphers         HIGH:!aNULL:!MD5;
...
It’s worth remembering this while creating your web server. Precise, finely-grained control over server behavior is highly useful but has some drawbacks. Configurations can be time consuming. They may also be susceptible to coding conflicts introduced elsewhere. On the certificate side, you’ll often have to create complex SSL certificate chains to ensure maximum cross-browser compatibility:
$ openssl s_client -connect www.godaddy.com:443
...
Certificate chain
0 s:/C=US/ST=Arizona/L=Scottsdale/1.3.6.1.4.1.311.60.2.1.3=US
/1.3.6.1.4.1.311.60.2.1.2=AZ/O=GoDaddy.com, Inc
/OU=MIS Department/CN=www.GoDaddy.com
/serialNumber=0796928-7/2.5.4.15=V1.0, Clause 5.(b)
i:/C=US/ST=Arizona/L=Scottsdale/O=GoDaddy.com, Inc.
/OU=http://certificates.godaddy.com/repository
/CN=Go Daddy Secure Certification Authority
/serialNumber=07969287
1 s:/C=US/ST=Arizona/L=Scottsdale/O=GoDaddy.com, Inc.
/OU=http://certificates.godaddy.com/repository
/CN=Go Daddy Secure Certification Authority
/serialNumber=07969287
i:/C=US/O=The Go Daddy Group, Inc.
/OU=Go Daddy Class 2 Certification Authority
2 s:/C=US/O=The Go Daddy Group, Inc.
/OU=Go Daddy Class 2 Certification Authority
i:/L=ValiCert Validation Network/O=ValiCert, Inc.
/OU=ValiCert Class 2 Policy Validation Authority
/CN=http://www.valicert.com//[email protected]
...
Spinning up your server therefore takes multiple steps. You must also take these tasks and scale them to include proxying, caching, logging, and API gateway setup. The case is similar for module-based web servers like Apache.
We don’t say this to knock either web server (in fact, we maintain official images for both Apache and NGINX). However — as a backend developer — you’ll want to weigh those development-and-deployment efforts vs. their collective benefits. That’s where a plug-and-play solution comes in handy. This is perfect for those without deep backend experience or those strapped for time.
Pros of Using Caddy 2
Written in Go, Caddy 2 (which we’ll simply call “Caddy” throughout this guide) acts as an enterprise-grade web server with automatic HTTPS. Other servers don’t share this same feature out of the box.
Additionally, Caddy 2 offers some pretty cool benefits:
- Automatic TLS certificate renewals
- OCSP stapling, to speed up SSL handshakes through request consolidation
- Static file serving for scripts, CSS, and images that enrich web applications
- Reverse proxying for scalability, load balancing, health checking, and circuit breaking
- Kubernetes (K8s) ingress, which interfaces with K8s’ Go client and SharedInformers
- Simplified logging, caching, API gateway, and firewall support
- Configurable, shared Websocket and proxy support with HTTP/2
This is not an exhaustive list, by any means. However, these baked-in features alone can cut deployment time significantly. We’ll explore how Caddy 2 works, and how it makes server setup more enjoyable. Let’s hop in.
Here’s How Caddy Works
One Caddy advantage is its approachability for developers of all skill levels. It also plays nicely with external configurations.
Have an existing web server configuration that you want to migrate over to Caddy? No problem. Native adapters convert NGINX, TOML, Caddyfiles, and other formats into Caddy’s JSON format. You won’t have to reinvent the wheel nor start fresh to deploy Caddy in a containerized fashion.
Here’s how your Caddyfile structure might appear:
example.com

# Templates give static sites some dynamic features
templates

# Compress responses according to Accept-Encoding headers
encode gzip zstd

# Make HTML file extension optional
try_files {path}.html {path}

# Send API requests to backend
reverse_proxy /api/* localhost:9005

# Serve everything else from the file system
file_server
Note that this Caddyfile is even considered complex by Caddy’s own standards (since you’re defining extra functionality). What if you want to run WordPress with fully-managed HTTPS? The following Caddyfile enables this:
example.com

root * /var/www/wordpress
php_fastcgi unix//run/php/php-version-fpm.sock
file_server
That’s it! Basic files can produce some impressive results. Each passes essential instructions to your server and tells it how to run. Caddy’s reference documentation is also extremely helpful should you want to explore further.
Quick Commands
Before tackling your image, Caddy has shared some rapid, one-line commands that perform some basic tasks. You’ll enter these through the Caddy CLI:
To create a quick, local file server:
$ caddy file-server
To create a public file server over HTTPS:
$ caddy file-server --domain yoursampleapp.com
To perform an HTTPS reverse proxy:
$ caddy reverse-proxy --from example.com --to localhost:9000
To run a Caddyfile-backed server in an existing working directory:
$ caddy run
Caddy notes that these commands are tested and approved for production deployments. They’re safe, easy, and reliable. Want to learn many more useful commands and subcommands? Check out Caddy’s CLI documentation to streamline your workflows.
Leveraging the Caddy Container Image
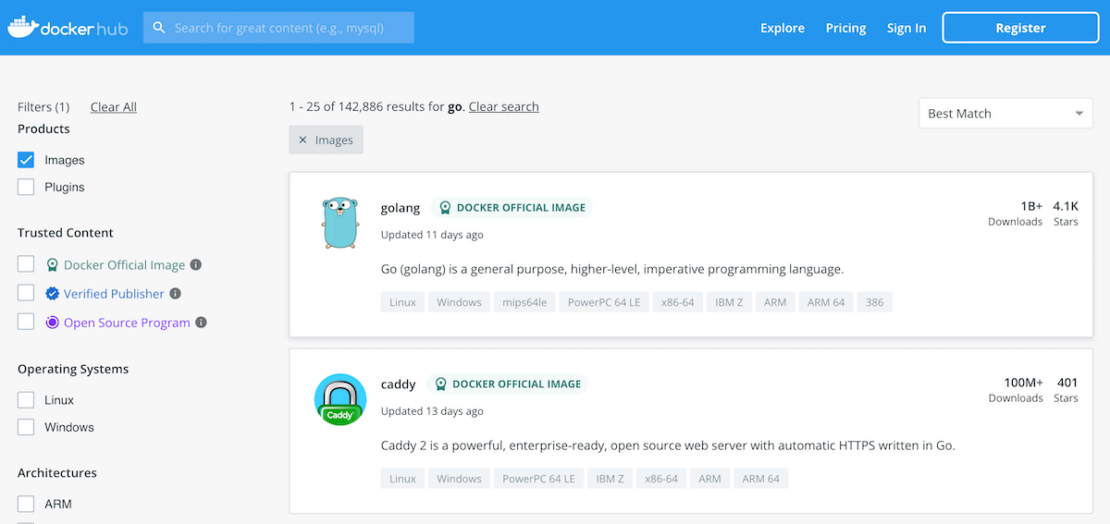
Caddy bills itself as a web-server solution with fewer moving parts, and therefore fewer management demands. Its static binary compiles for any platform. Since Caddy has no dependencies, it can run practically anywhere — and within containers. This makes it a perfect match for Docker, which is why developers have downloaded Caddy’s Docker Official Image over 100 million times. You can find our Caddy image on Docker Hub.

We’ll discuss how to use this image to deploy your web applications faster, and share some supporting Docker mechanisms that can help streamline those processes. You don’t even need libc, either.
Prerequisites
- A free Docker Hub account – for complete push/pull registry access to our Caddy Official Image
- The latest version of Docker Desktop, tailored to your OS and CPU (for macOS users)
- Your preferred IDE, though VSCode is popular
Docker Desktop unlocks greater productivity around container, image, and server management. Although the CLI remains available, we’re leveraging the GUI while running important tasks.
Pull Your Caddy Image
Getting started with Docker’s official Caddy image is easy. Enter the docker pull caddy:latest command to download the image locally on your machine. You can also specify a Caddy image version using a number of available tags.
Entering docker pull caddy:latest grabs Caddy’s current version, while docker pull caddy:2.5.1 requests an image running Caddy v2.5.1 (for example).
Using :latest is okay during testing but not always recommended in production. Ideally, you’ll aim to thoroughly test and vet any image from a security standpoint before using it. Pulling caddy:latest (or any image tagged similarly) may invite unwanted gremlins into your deployment.
Since Docker automatically grabs the newest release, it’s harder to pre-inspect that image or notice that changes have been made. However, :latest images can include the most up-to-date vulnerability and bug fixes. Image release notes are helpful here.
You can confirm your successful image pull within Docker Desktop:

After pulling caddy:latest, you can enter the docker image ls command to view its size. Caddy is even smaller than both NGINX and Apache’s httpd images:

Need to inspect the contents of your Caddy image? Docker Desktop lets you summon a Docker Software Bill of Materials (SBOM) — which lists all packages contained within your designated image. Simply enter the docker sbom caddy:latest command (or use any container image:tag):
You’ll see that your 43.1MB caddy:latest image contains 129 packages. These help Caddy run effectively cross-platform.
Run Your Caddy Image
Your image is ready to go! Next, run your image to confirm that Caddy is working properly with the following command:
docker run --rm -d -p 8080:80 --name web caddy
Each portion of this command serves a purpose:
--rmremoves the container when it exits or when the daemon exits (whichever comes first)-druns your Caddy container in the background-pdesignates port connections between host and container--namelets you assign a non-random name to your imagewebis an argument to the--nameflag, and is the descriptive name of your running containercaddyis your image’s name, which was automatically assigned during your initialdocker pullcommand
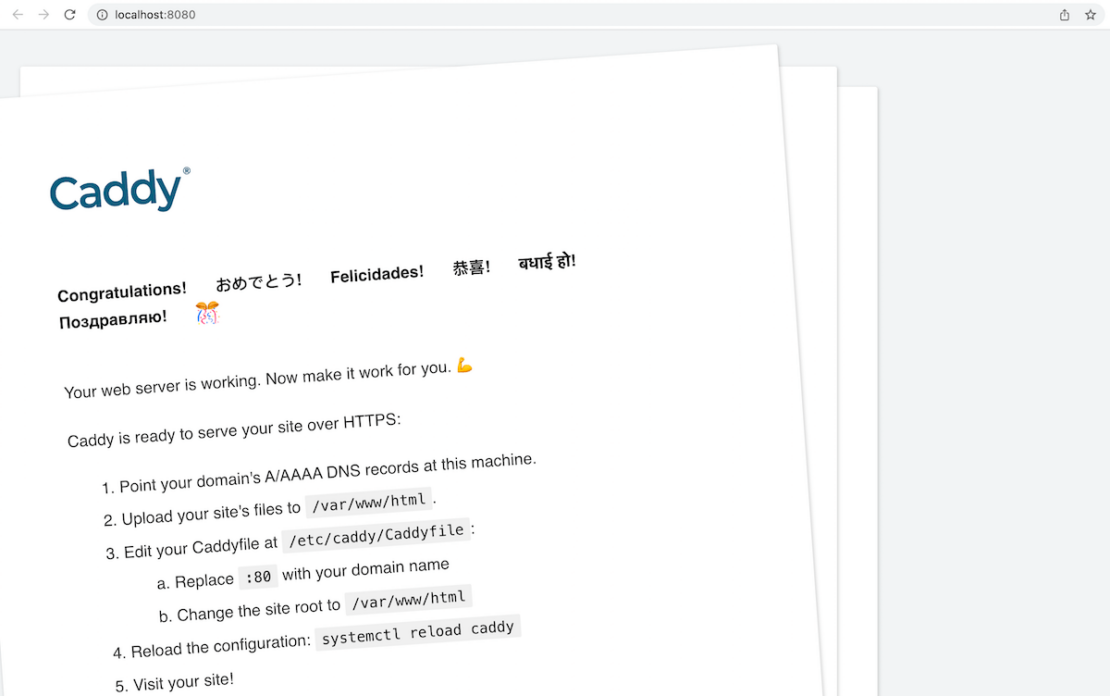
Since you’ve established a port connection, navigate to localhost:8080 in your browser. Caddy should display a webpage:

You’ll see some additional instructions for setting up Caddy 2. Scrolling further down the page also reveals more details, plus some handy troubleshooting tips.
Time to Customize
These next steps will help you customize your web application and map it into the container. Caddy uses the /var/www/html path to store your critical static website files.
Here’s where you’ll store any CSS or HTML — or anything residing within your index.html file. Additionally, this becomes your root directory once your Caddyfile is complete.
Locate your Caddyfile at /etc/caddy/Caddyfile to make any important configuration changes. Caddy’s documentation provides a fantastic breakdown of what’s possible, while the Caddyfile Tutorial guides you step-by-step.
The steps mentioned above describe resources that’ll exist within your Caddy container, not those that exist on your local machine. Because of this, it’s often necessary to reload Caddy to apply any configuration changes, or otherwise. You can apply any new changes by entering systemctl reload caddy in your CLI, and visiting your site as confirmation. Running your Caddy server within a Docker container requires just one extra shell command:
$ docker exec -w /etc/caddy web caddy reload
This gracefully reloads your content without a complete restart. That process is otherwise time consuming and disruptive.
Next, you can serve your updated index.html file by entering the following. You’ll create a working directory and run the following commands from that directory:
$ mkdir docker-caddy
$ cd docker-caddy
$ echo "hello world" > index.html
$ docker run -d -p 8080:80 \
-v $PWD/index.html:/usr/share/caddy/index.html \
-v caddy_data:/data \
caddy
...
$ curl http://localhost/
hello world
Want to quickly push new configurations to your Caddy server? Caddy provides a RESTful JSON API that lets you POST sets of changes with minimal effort. This isn’t necessary for our tutorial, though you may find this config structure useful in the future:
POST /config/

{
"apps": {
"http": {
"servers": {
"example": {
"listen": ["127.0.0.1:2080"],
"routes": [{
"@id": "demo",
"handle": [{
"handler": "file_server",
"browse": {}
}]
}]
}
}
}
}
}
No matter which route you take, any changes made through Caddy’s API are persisted on disk and continually usable after restarts. Caddy’s API docs explain this and more in greater detail.
Building Your Caddy-Based Dockerfile
Finally, half the magic of using Caddy and Docker rests with the Dockerfile. You don’t always want to mount your files within a container. Instead, it’s often better to COPY files or directories from a remote source and base your image on them:
FROM caddy:<version>

COPY Caddyfile /etc/caddy/Caddyfile
COPY site /srv
This adds your Caddyfile in using an absolute path. You can even add modules to your Caddy Dockerfile to extend your server’s functionality. Caddy’s :builder image streamlines this process significantly. Just note that this version is much larger than the standard Caddy image. To reduce bloat, the FROM instruction uses a binary overlay to save space:
FROM caddy:builder AS builder

RUN xcaddy build \
--with github.com/caddyserver/nginx-adapter \
--with github.com/hairyhenderson/[email protected]

FROM caddy:<version>

COPY --from=builder /usr/bin/caddy /usr/bin/caddy
You’re also welcome to add any of Caddy’s available modules, which are free to download. Congratulations! You now have all the ingredients needed to deploy a functional Caddy 2 web application.
Quick Notes on Docker Compose
Though not required, you can use docker compose to run your Caddy-based stack. As a side note, Docker Compose V2 is also written in Go. You’d store this Compose content within a docker-compose.yml file, which looks like this:
version: "3.7"

services:
caddy:
image: caddy:<version>
restart: unless-stopped
ports:
- "80:80"
- "443:443"
volumes:
- $PWD/site:/srv
- caddy_data:/data
- caddy_config:/config

volumes:
caddy_data:
caddy_config:
Stopping and Reviving Your Containers
Want to stop your container? Simply enter docker stop web to shut it down within 10 seconds. If this process stalls, Docker will kill your container immediately. You can customize and extend this timeout with the following command:
docker stop --time=30 web
However, doing this is easier using Docker Desktop — and specifically the Docker Dashboard. In the sidebar, navigate to the Containers pane. Next, locate your Caddy server container titled “web” in the list, hover over it, and click the square Stop icon. This performs the same task from our first command above:

You’ll also see options to Open in Browser, launch the container CLI, Restart, or Delete.
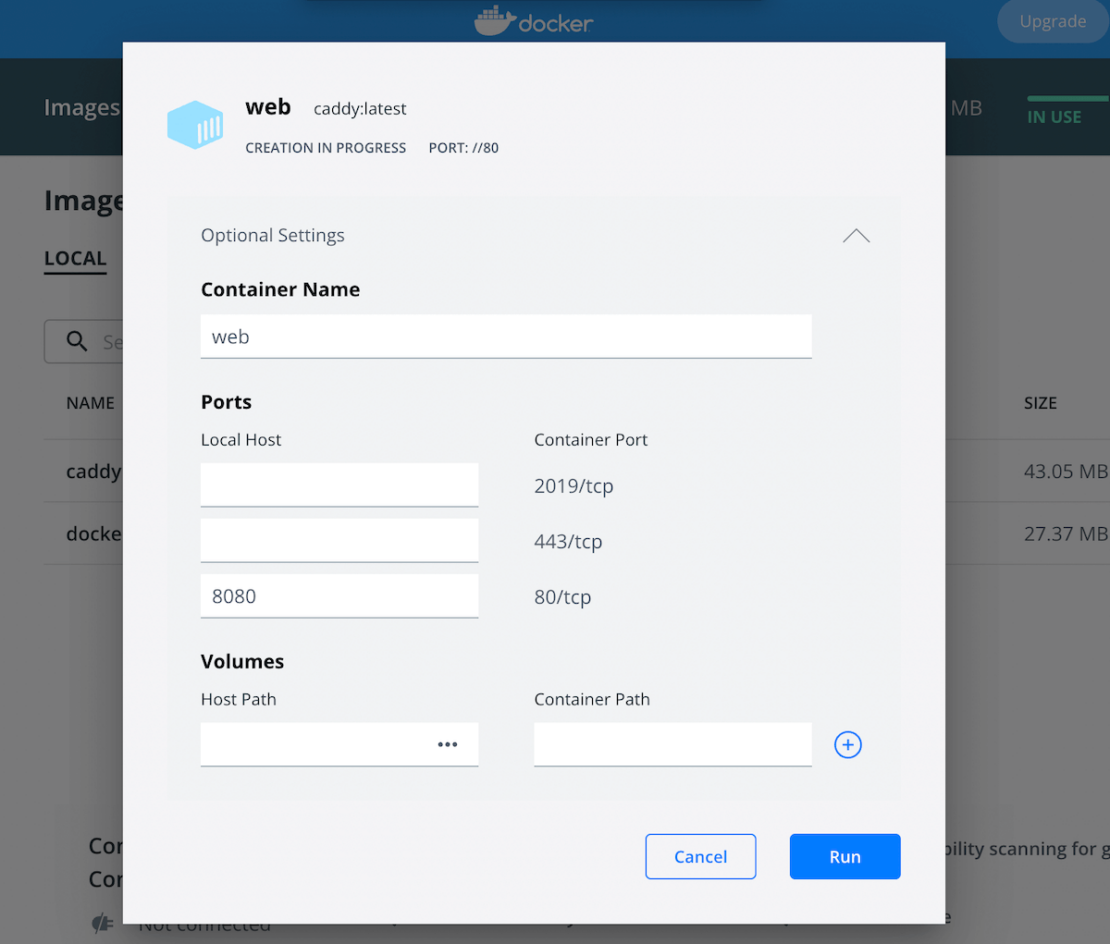
Stop your Caddy container by accident, or want to spin up another? Navigate to the Images pane, locate caddy in the list, hover over it, and click the Run button that appears. Once the modal appears, expand the Optional Settings section. Next, do the following:
- Name your new container something meaningful
- Designate your Local Host port as 8080 and map it Container Port 80
- Mount any volumes you want, though this isn’t necessary for this demo
- Click the Run button to confirm

Finally, revisit the Containers pane, locate your new container, and click Open in Browser. You should see the very same webpage that your Caddy server rendered earlier, if things are working properly.
Conclusion
Despite the popularity of Apache and NGINX, developers have other server options at their disposal. Alternatives like Caddy 2 can save time, effort, and make the deployment process much smoother. Reduced dependencies, needed configurations, and even Docker integration help simplify each management step. As a bonus, you’re also supporting an open-source project.
Are you currently using Caddy 1 and want to upgrade to Caddy 2? Follow along with Caddy’s official documentation to understand the process.


Feedback
0 thoughts on "Deploying Web Applications Quicker and Easier with Caddy 2"