In yesterday’s blog about improvements to the end-to-end Docker developer experience, I was thrilled to share how we are integrating security into image development, and to announce the launch of vulnerability scanning for images pushed to the Hub. This release is one step in our collaboration with our partner Snyk where we are integrating their security testing technology into the Docker platform. Today, I want to expand on our announcements and show you how to get started with image scanning with Snyk.
In this blog I will show you why scanning Hub images is important, how to configure the Hub pages to trigger Snyk vulnerability scans, and how to run your scans and understand the results. I will also provide suggestions incorporating vulnerability scanning into your development workflows so that you include regular security checkpoints along each step of your application deployment.
Software vulnerability scanners have been around for a while to detect vulnerabilities that hackers use for software exploitation. Traditionally security teams ran scanners after developers thought that their work was done, frequently sending code back to developers to fix known vulnerabilities. In today’s “shift-left” paradigm, scanning is applied earlier during the development and CI cycles but most organizations have to build their own automation to connect the scan functions to the CI instruments. Yesterday’s release changes this equation and provides built in automated scanning as an integral step within the CI cycle.
Now you decide which repos to configure for vulnerability scanning to trigger a scan every time you push an image into that repo, and when the scan is completed you can view the scan results in your Hub account. Vulnerability data is organized in the Hub in several different layers: vulnerability severity summary, list of all vulnerabilities, and detailed information about a specific security flaw. The scanning function is available for Pro and Team users, creating a simple method of validation for each image update.
How It Works
Step 1 – Enable Repo Scanning Functions
Enabling repo scanning is a simple, single-click process, but the default setting is for disabled scanning so make sure you turn it on.

Scanning is separately configurable for each repo so you can decide how you want to start incorporating scanning into your team collaboration cycles and application build steps. You can adopt these processes on a smaller scale and over time expand them to the rest of your organization. Conversely, if you decide that the repo that you have been scanning is no longer an active part of your development, you can use the same single-click option to disable scanning.
Step 2 – Run your scans
Once you enable scanning, each time that you push a tagged image into that repo you will automatically trigger a scan.

Step 3 – View the Results
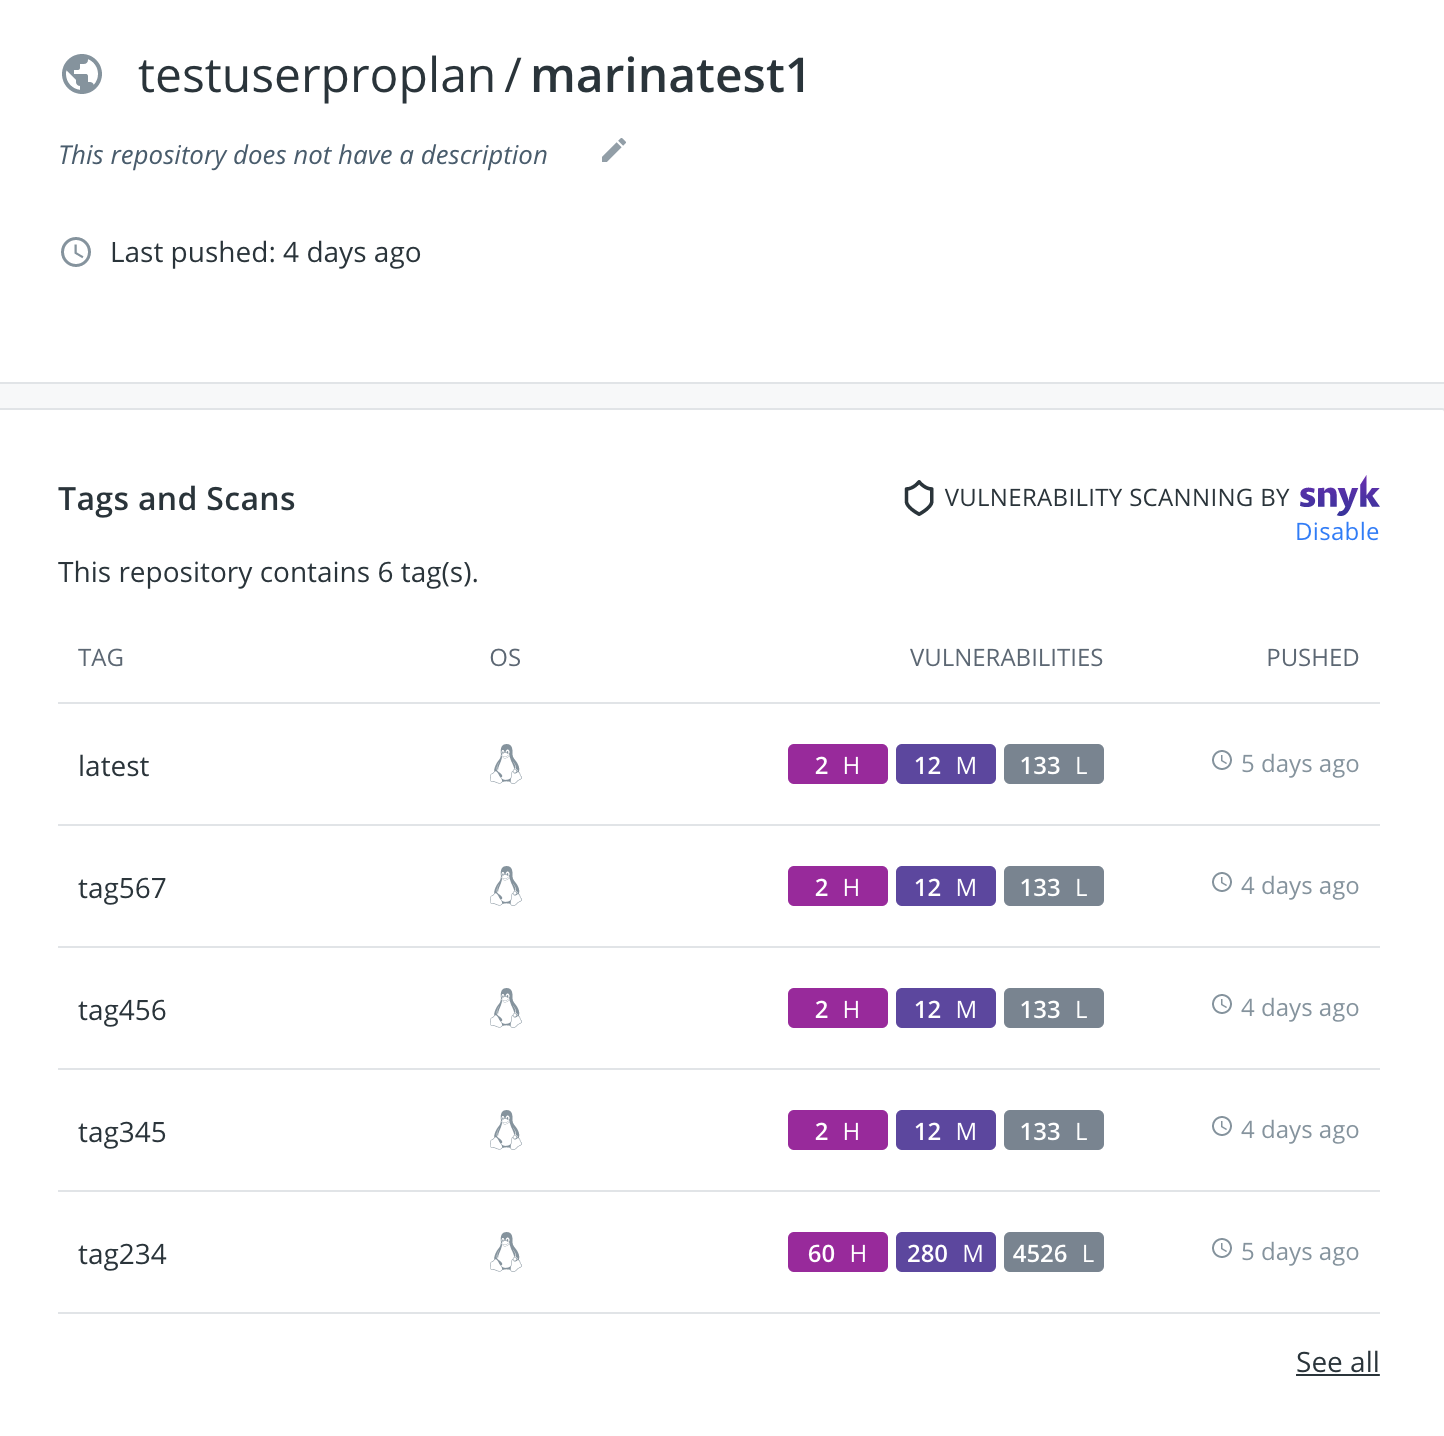
After vulnerability scanning is completed, you can go to the repo page in the Hub to view the scan results. General Tab of the Hub Repo page includes results summary for all the repo image scans which will show the number of high, medium and low vulnerabilities identified during each scan.
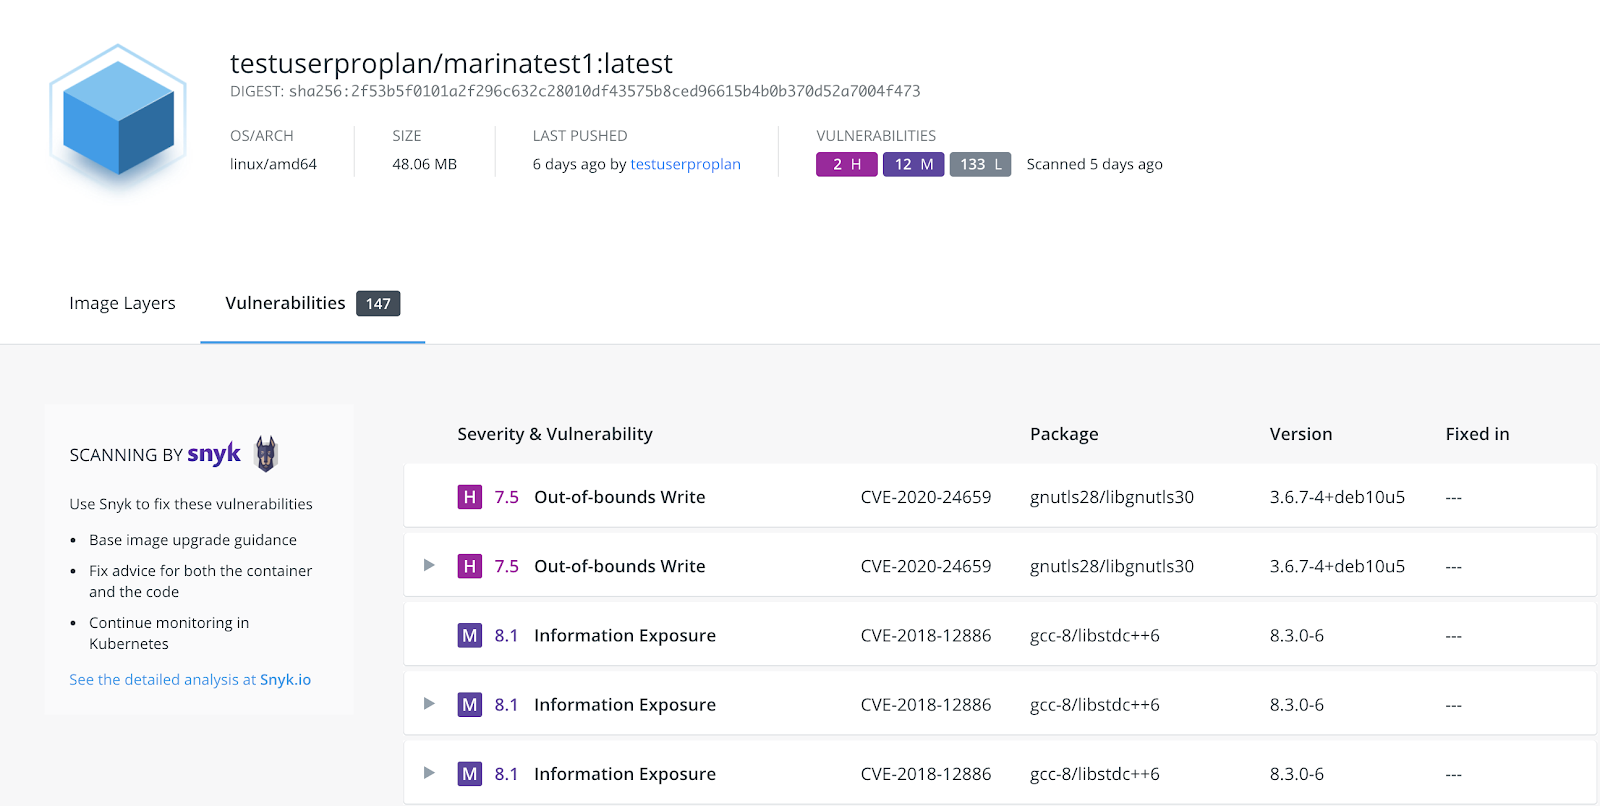
Clicking on the Vulnerabilities section of a specific tag brings you to the Vulnerability Tab for that tag, which shows the total number of vulnerabilities identified during the scan. Vulnerabilities Tab includes the scan severities summary and shows you the full list of scan vulnerabilities.

The vulnerability list is organized so that you will see the most critical vulnerabilities first. The higher severity issues are prioritized above the lower ones, and the same severity vulnerabilities are organized in the descending order for the Common Vulnerability Scoring System (CVSS) . CVSS scores are a published standard for assigning numerical value to the severity of software vulnerabilities. Vulnerability list also includes Common Vulnerabilities and Exposures (CVEs), which are identification numbers for publicly known cybersecurity vulnerabilities as well as name and version of a package containing this vulnerability. If available, the ‘Fixed In’ column includes a higher version of the same package that has the vulnerability resolved. This is a very important part that gives you clear guidance on how to rebuild your image without the vulnerability.
Next to the ‘Fixed In’ column is a pop-up link to a page on the Snyk website, presenting detailed information about that specific vulnerability.

The little arrow located next to the Severity rating indicates that this vulnerability has dependencies. Clicking on this arrow expands the vulnerability box and displays these dependencies:

Learn More and Try It For Yourself
Hub scanning is already available. Please check the Docker Doc section link below for more information on how to get started and give us feedback:
https://docs.docker.com/docker-hub/vulnerability-scanning/
To learn more from experts about getting the most from Docker Hub vulnerability scanning, please plan on joining Docker’s Peter McKee and Snyk’s Jim Armstrong for a joint webinar on Wednesday, Oct 15. Register now!

Feedback
0 thoughts on "Improve the Security of Hub Container Images with Automatic Vulnerability Scans"